
Building a Standing Desk
This post contains references to products from one or more of our advertisers. We may receive compensation when you click on links to those products. Terms apply to the offers listed on this page. For an explanation of our Advertising Policy, visit this page.
A standing desk is a great way to help with back problems or other potential health issues. While standing desks can be expensive, there are also really cheap options out there. The desk in this article won't break the bank, but will give you a few more features than the basic desks you can buy for cheap.

Building your own standing desk is quite simple, and can be economical as well. It also allows you to build it exactly like you want.
Several years ago, I was in the market for a standing desk. At the time, standing desks were nowhere near as popular as they are these days, and the options to buy one were very expensive.
These days, you can buy a standing desk at reasonable prices. The only downside is that you’re going to get a very basic desk, but it’s certainly much easier than building your own.
If you want a desk that’s all your own, or that has more than just a plain desk, then building your own is a great option, and will be as cheap, if not cheaper, than the basic options.
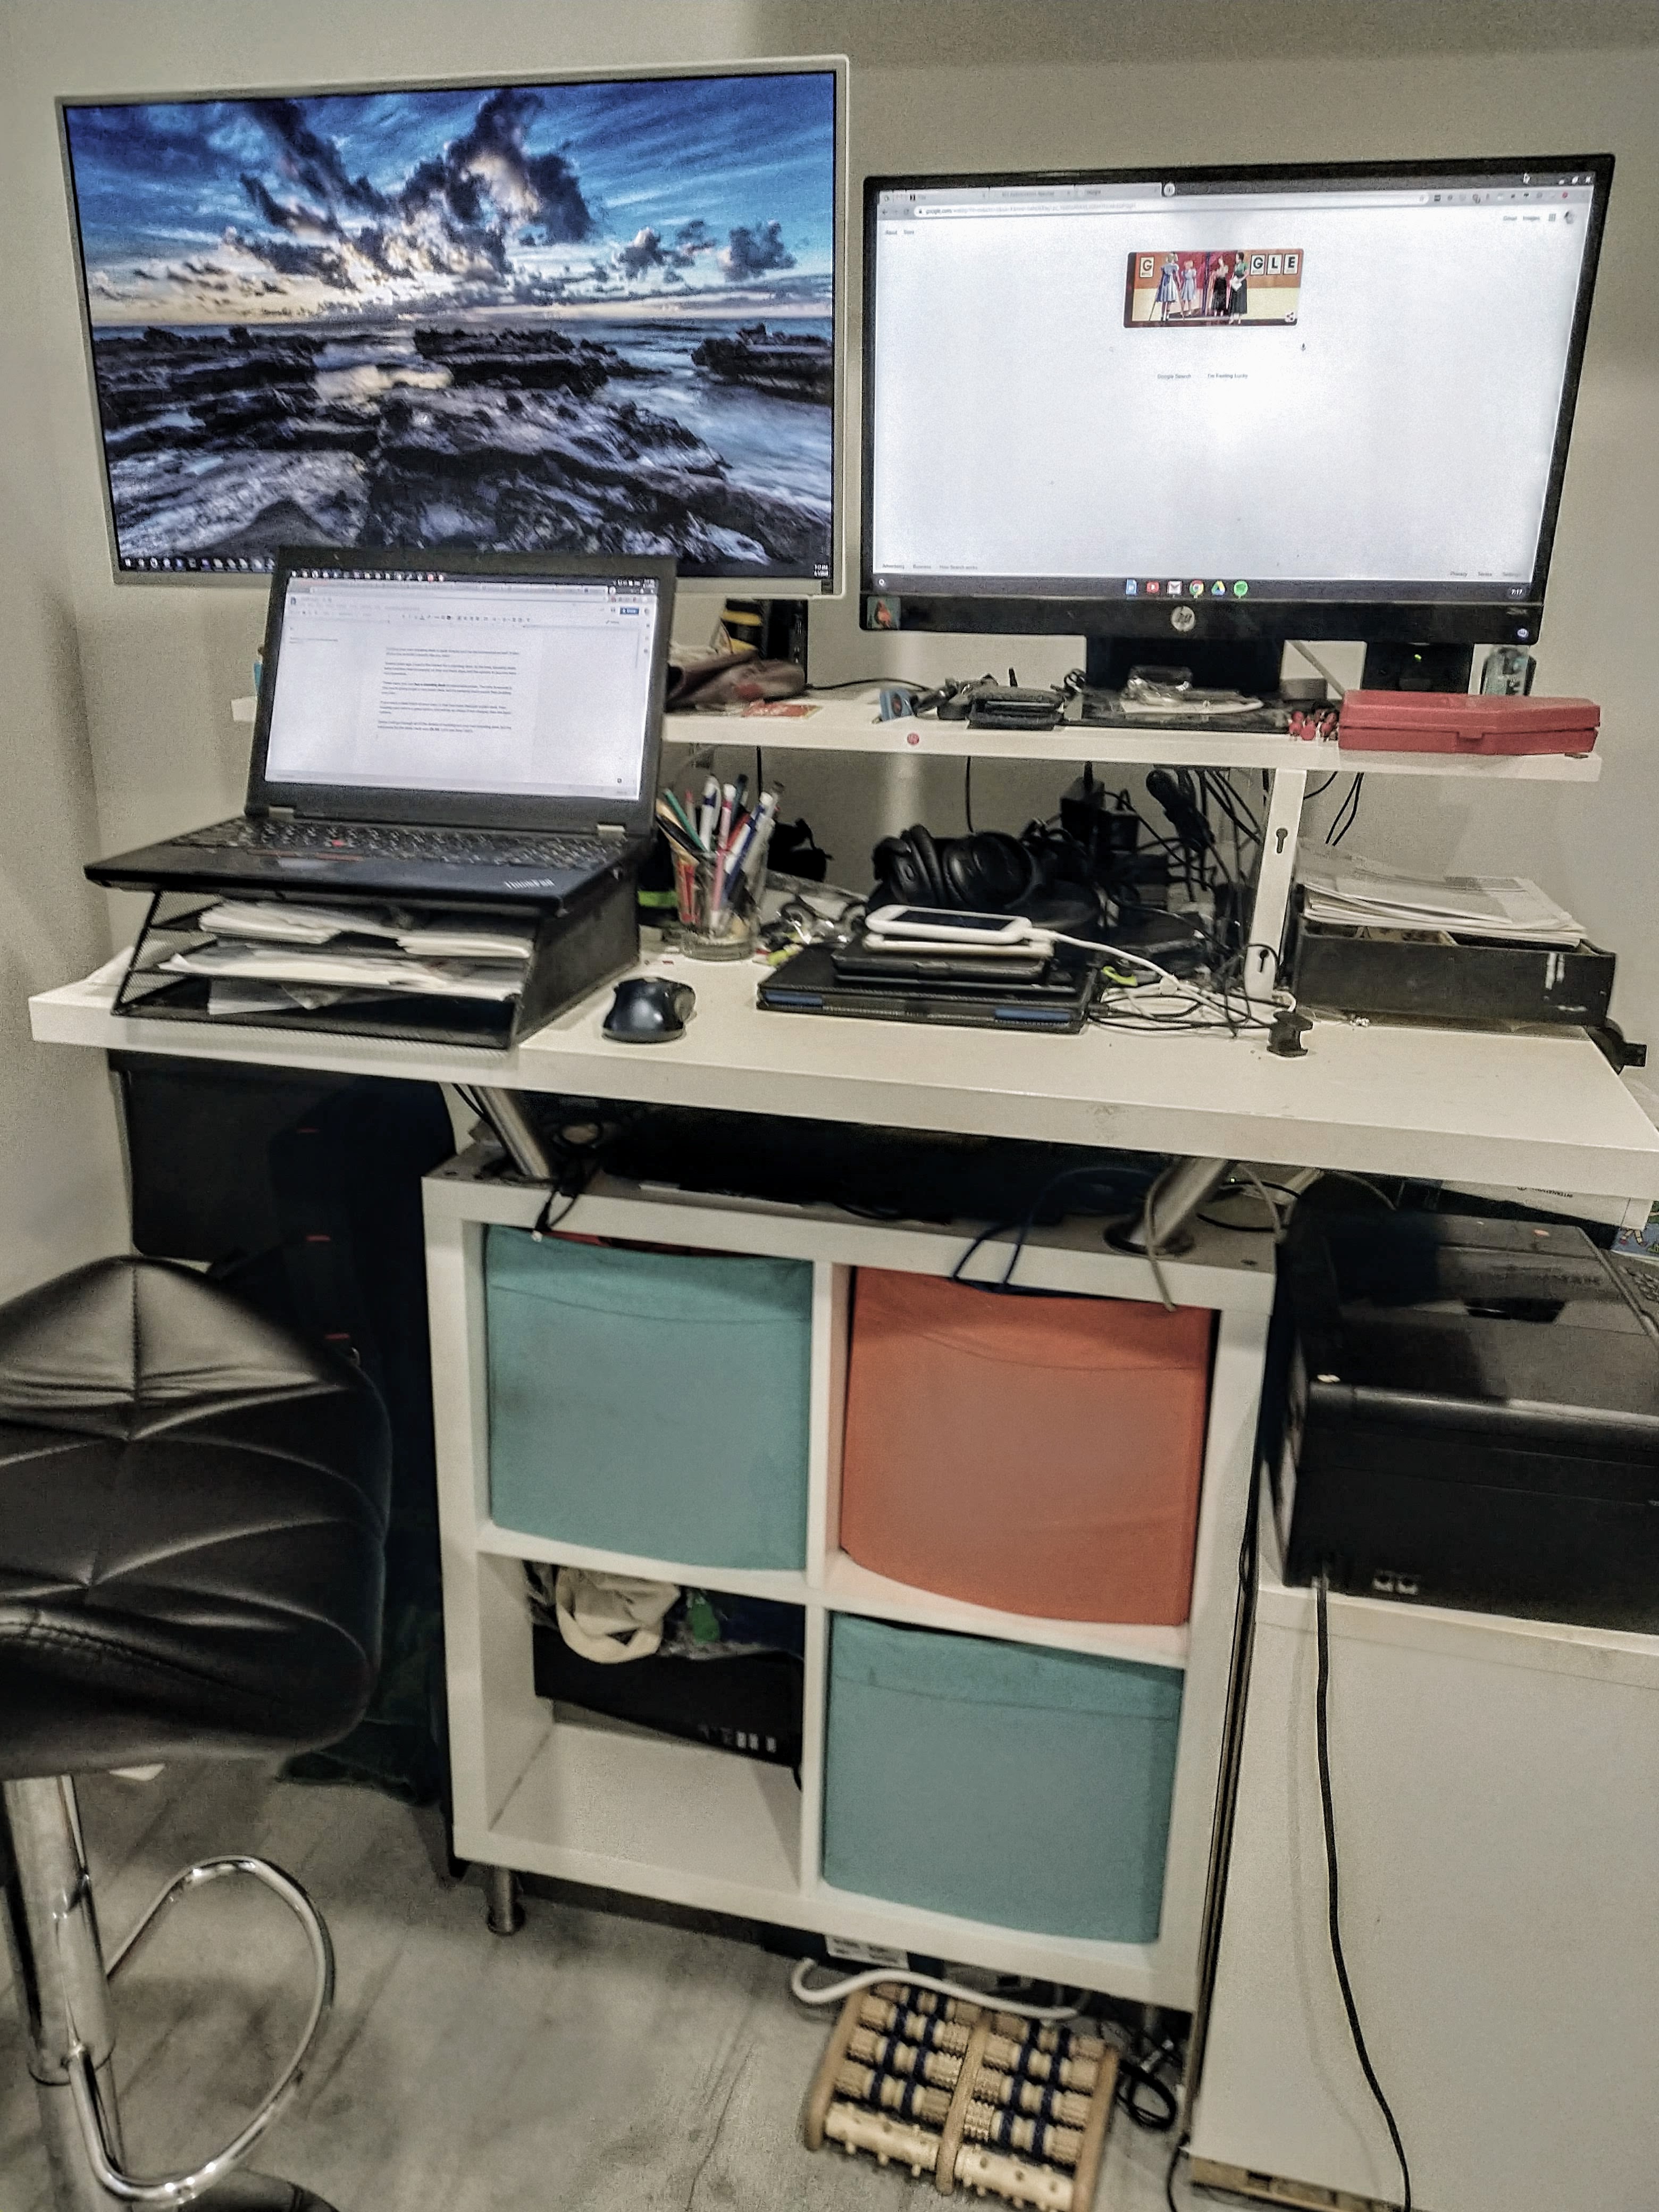
I built my standing desk over 5 years ago. The exact products I used have changed since then. In fact, the top shelf (that my monitors sit on) are basically impossible to build out with just IKEA items. As such, I’ll be breaking my built into two parts - the main desk, and then the monitor shelf which is modified for what I could find that should work.
Below I will go through all of the details of building out your own standing desk, but my total price for the desk I built was $188 (when I built several years ago, it was much cheaper, but a couple of the parts are quite expensive now).
Materials
The important part of the pieces below are more in the measurements themselves if you want a desk similar to what I’ve done. As I stated before, a lot of the stuff IKEA carries has changed over the years, and so the below items are comparatively the same.
| Item | Price |
|---|---|
| KALLAX Shelf unit, white, 30 3/8x30 3/8" | $39 |
| LINNMON Tabletop, white, 47 1/4x23 5/8" | $23 |
| CAPITA Leg, stainless steel, 4 1/2" | $13 |
| CAPITA Brackets (GB IKEA link) | $37 x 2 |
| Monitor shelf materials | - |
| BERGSHULT / SANDSHULT Wall shelf, white, aspen, 47 1/4x11 3/4" | $29 |
| 4 shelf brackets | $7 |
| 2 x 4 - buy at your local hardware store | $3 |
Price for the desk: $149
Price for desk and monitor shelf: $188
How to build the desk
Build the bottom shelf unit
It’s a 4 cupboard shelf, and should be pretty straightforward to put together. IKEA furniture is pretty easy to put together in general, and if you’ve done it before, it’s basically all the same.
Put the legs on the bottom shelf
The legs that are on the bottom of the shelf should connect directly to the shelf unit you just put together. There are 4 screws per leg, so you may want to use a drill bit to get those holes started before screwing the legs onto the shelf. Place one leg in each corner.
Measure and drill for the top brackets
The slanted brackets that go on the top of the built out shelf unit will connect with a bolt and nut. This shelf is not built to have these placed on the unit, so you’re going to need to do a little bit of your own work.
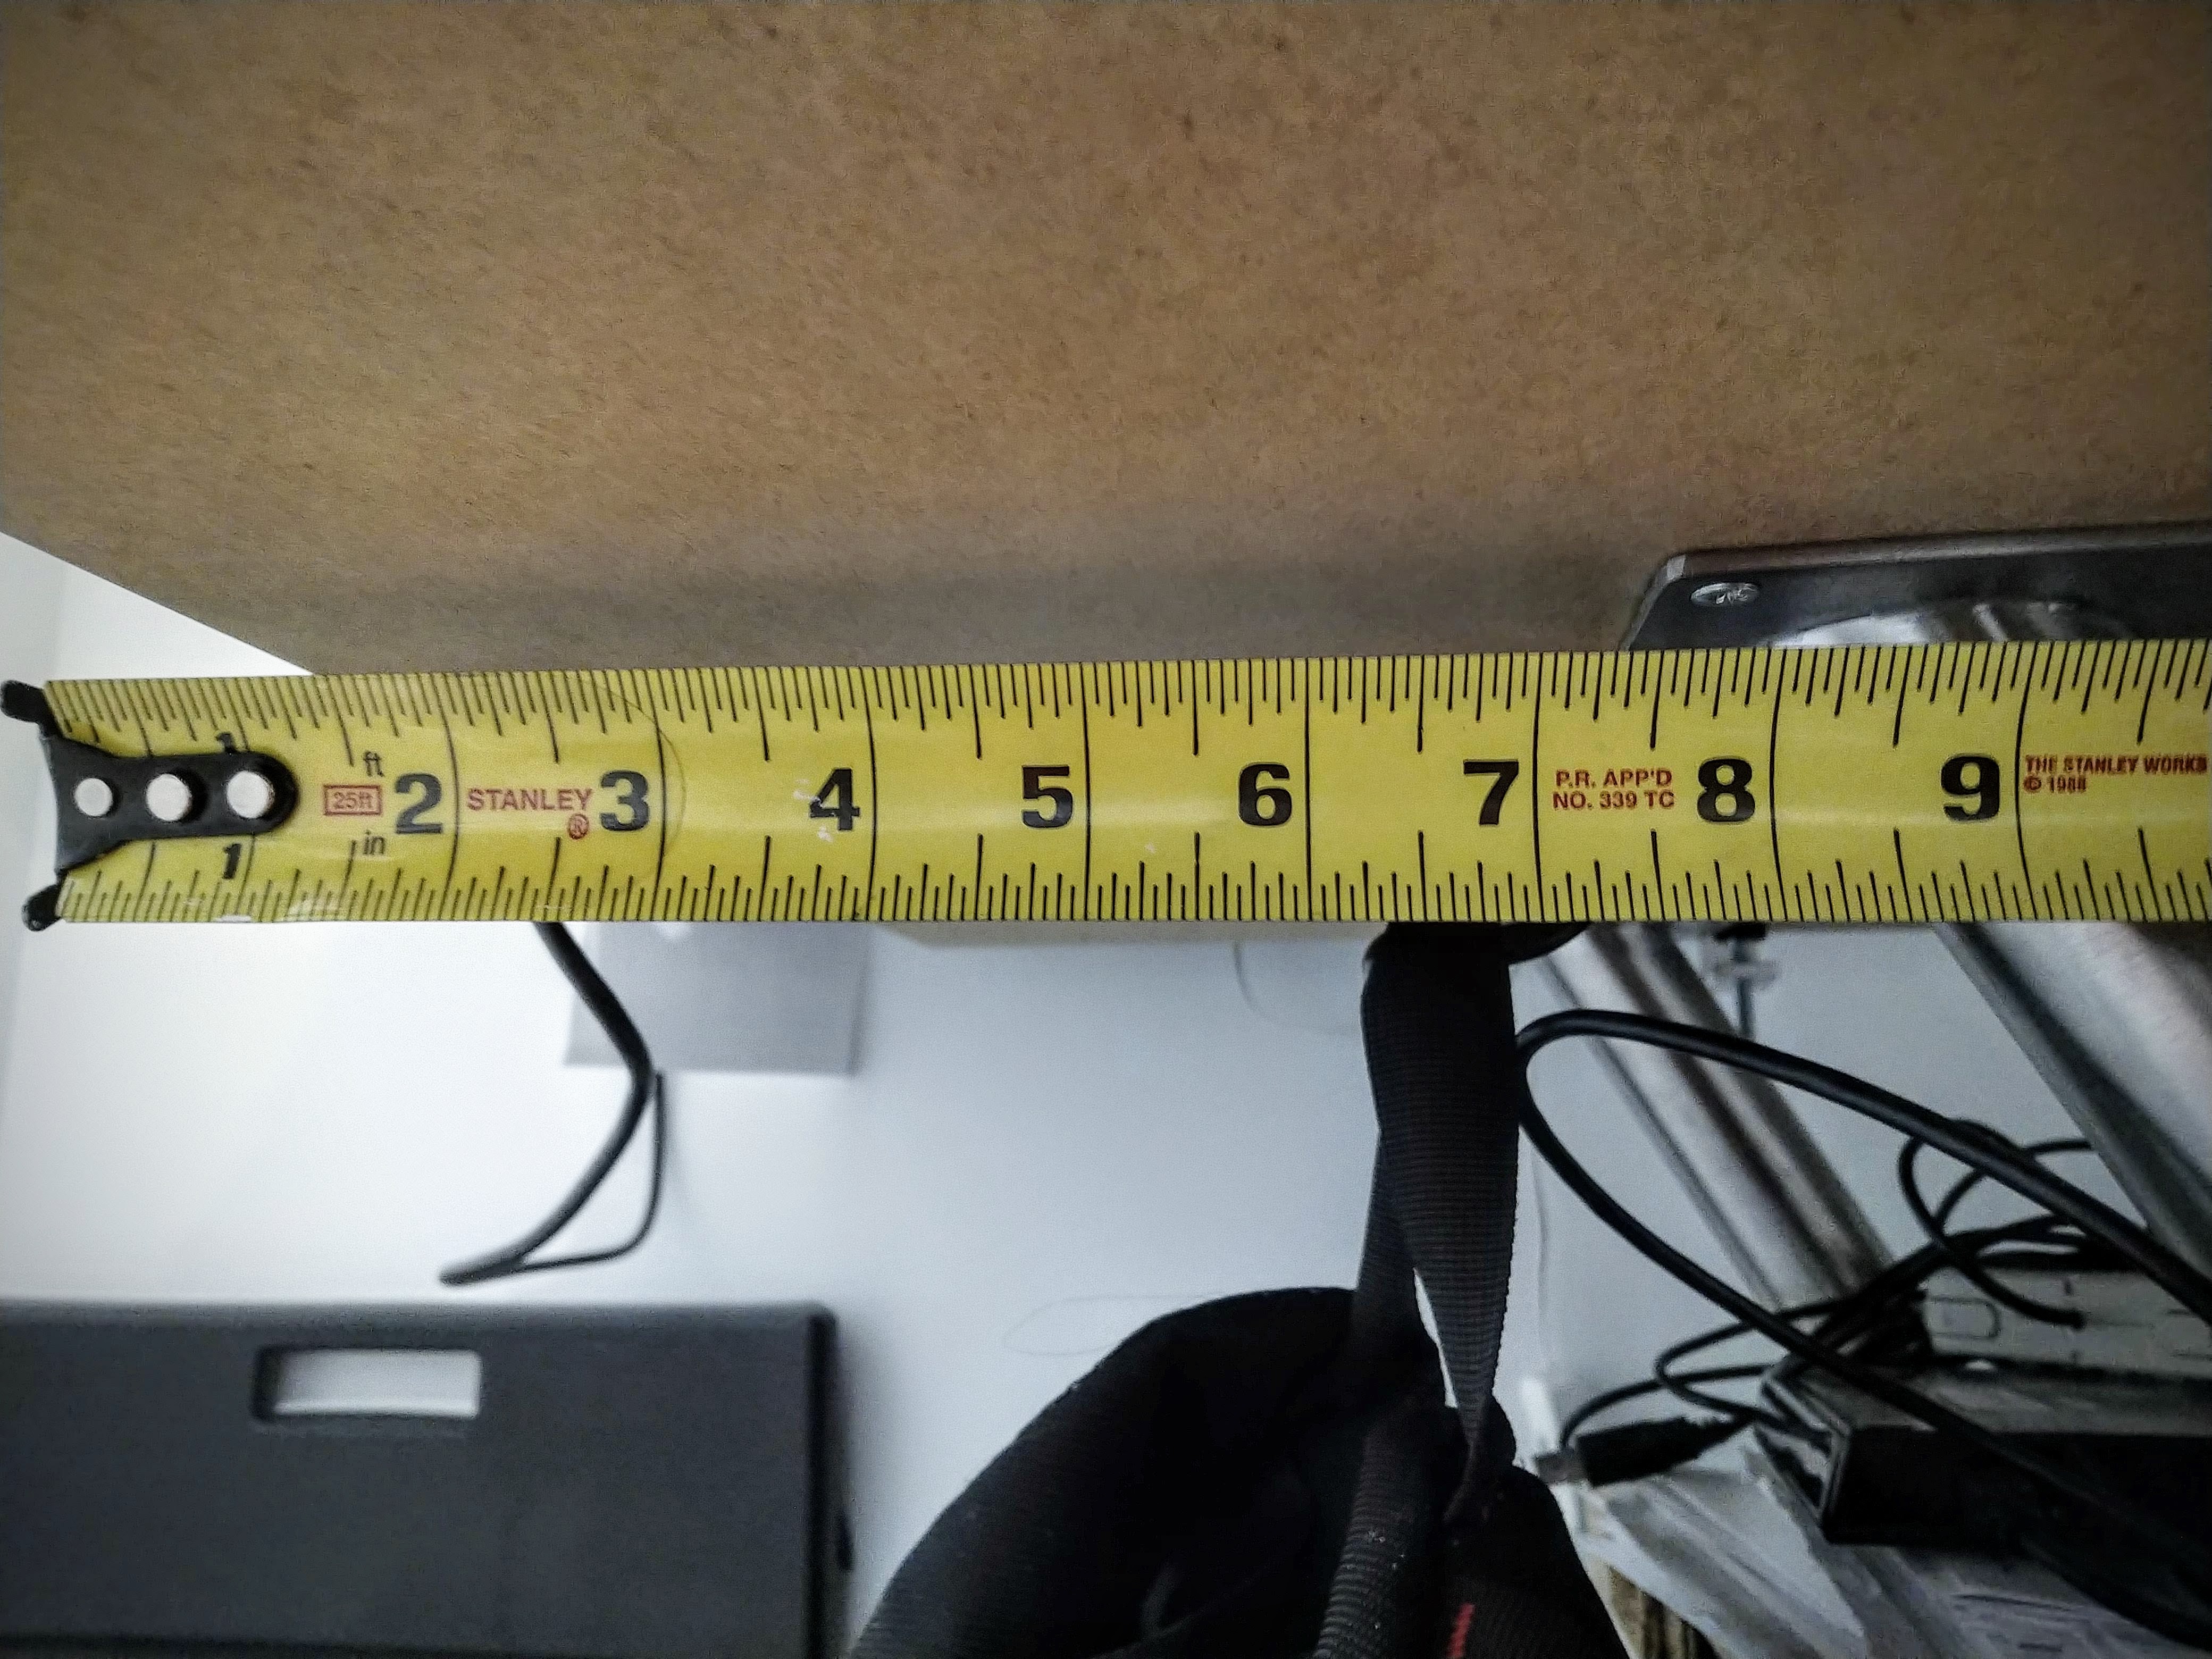
Get your drill and a bit that is large enough for the bolt to go through. Measure 4 inches from the side edge, and 1 ½ inches from the front/back edge of the shelf. This is where you will drill your hole for each bracket.
You will drill 4 holes in the top of the unit - one for each bracket. Drill your holes and connect each bracket. You’ll want the brackets to slant outwards from the bottom shelf as the desk on top will be larger than the bottom shelf.
Measure and drill the main desk
The top desk will sit forward on the brackets. What this means is that your table will sit in the center of the brackets from side to side, but the back brackets will be right up to the back edge of the shelf.
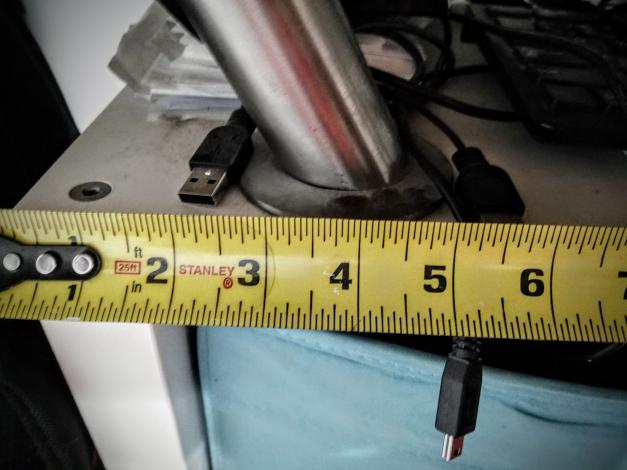
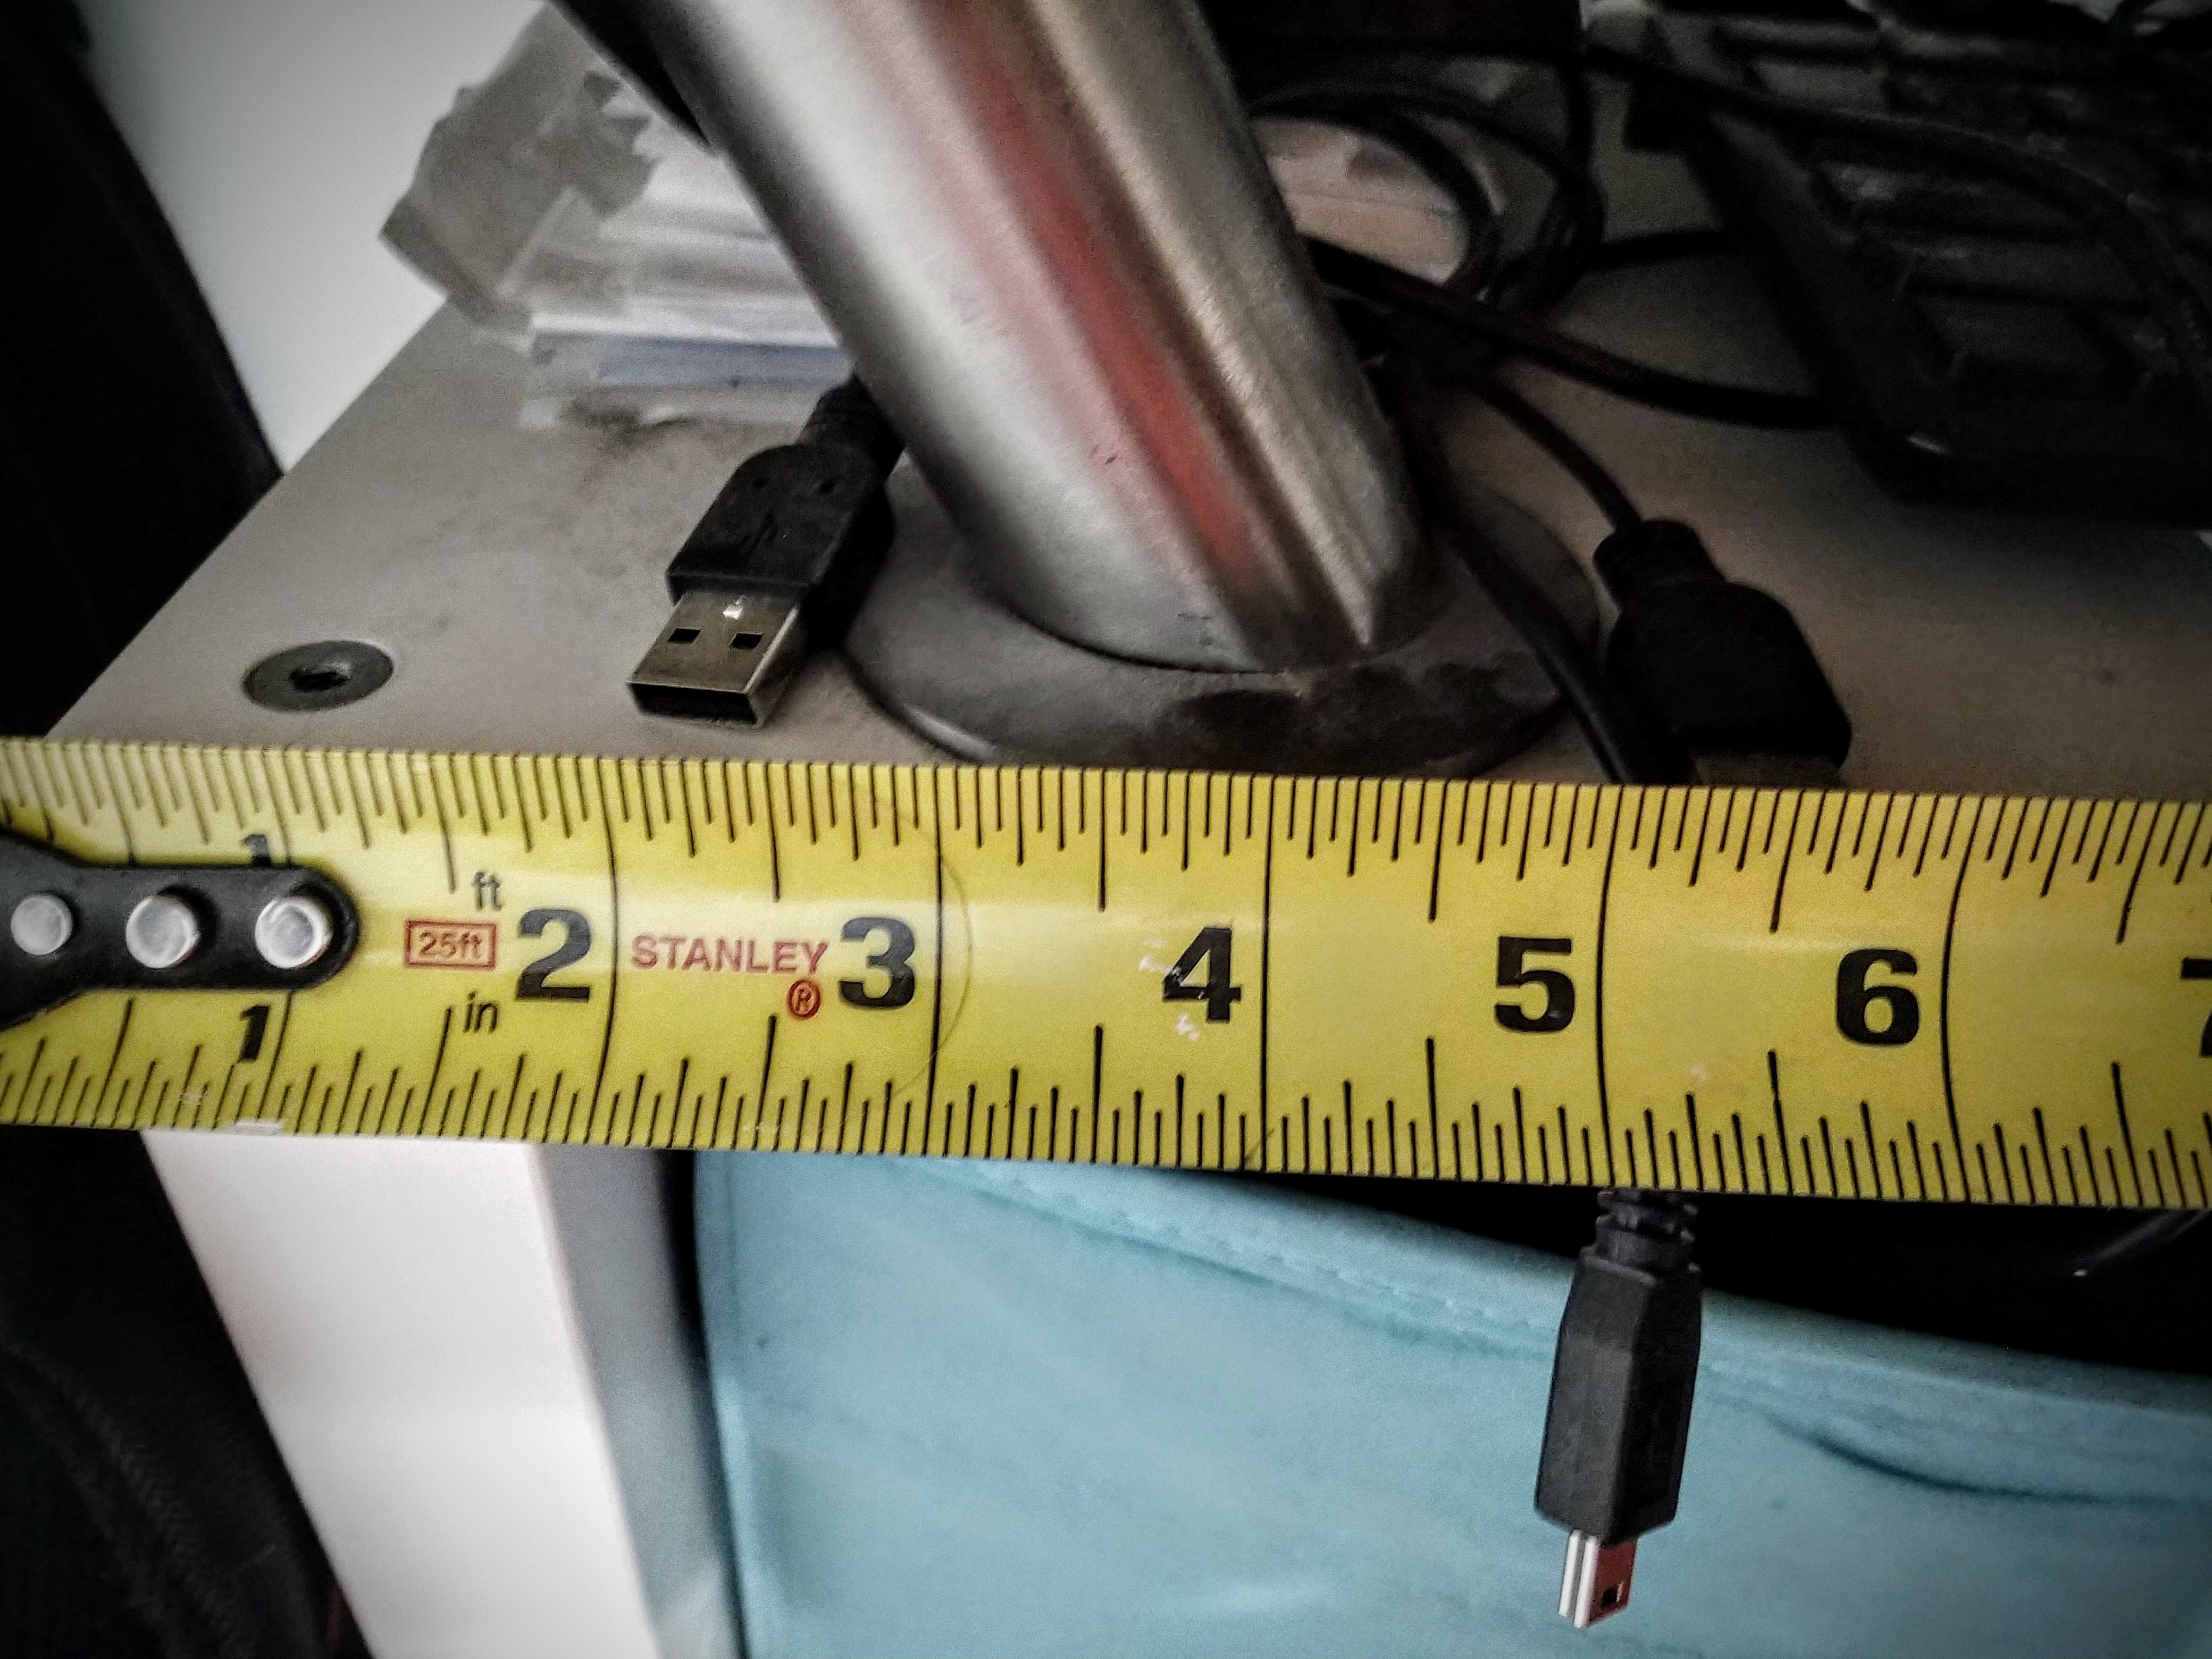
Set the desk unit on top of the brackets, and get it centered on the brackets. From the outer edge of the desk to the edge of the bracket is 7 ½ inches on each side. On the back of the desk, your desk should be lined up with the back edge of the brackets. This leaves about 8 ½ inches of overhang on the front of the desk.
Once you’ve got the desk where it will be once connected, mark your screw holes with a pencil. After you’ve got all of the pencil holes marked, you’ll pull the desk off to pre drill the holes.
Put the desk back on and screw it on. A little help on this step is really useful as you’re going to need someone to push down while you screw up. Another option is to flip the whole desk and unit over and screw in the desk while it’s laying on the ground (I’m sure this is what I did at the time).
At this point, your main desk is ready. You should have a standing desk for home that you can use as you’d like. You can place monitors on a higher level using a box or other monitor stand. Keep reading for the additional monitor stand.
How to add the monitor stand
I spent a ton of time trying to find something simpler for building the monitor stand, but just couldn’t seem to find anything that fit the mark. IKEA used to carry to different shelf holders that were more like rectangles than the angle holders they have now.
Since they don’t appear to make these parts any longer, it’s now much harder to add the shelf unit on the top.
Determine height of monitor shelf
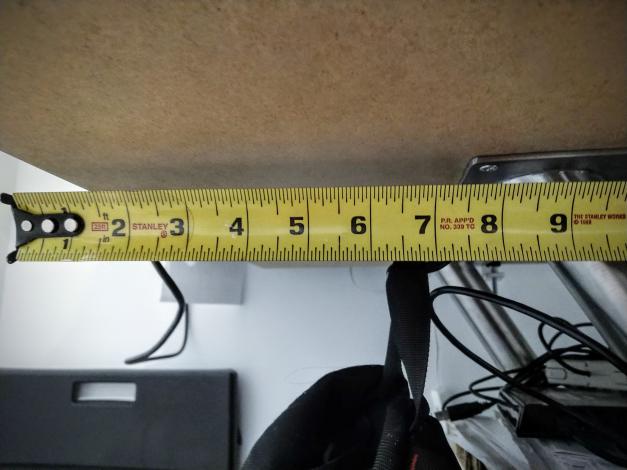
First off, we need to figure out how high off the desk unit you want the shelf to be. From the top of my desk, to the bottom of my shelf is 7 ½ inches. You can go higher or lower.
We’re going to need 4 boards that are all cut to the 7 ½ inch length. Grab your tape measure and saw, and cut 4 pieces from your 2 x 4 that are at this length.
You’ll also need to cut two additional boards that are 8 inches in length. These boards will be used to sit on the top of the desk, and the boards you cut for your height (7 ½ inches) will connect to this board.
Build stand for monitor shelf
Now that we have our boards all cut, we need to get them connected. I would use screws for the stand, but you can use nails if you’d prefer.
For screws, we need to drill holes through the boards that will be used for stands. We’ll be screwing these boards into the board that is sitting on the top of your desk. You should drill two holes in each board for this purpose. If you don’t drill holes before putting your screws in, you will split your boards.
After drilling your holes, screw them to the base board. You should have a strong base now.
The next step is to take the L shaped metal brackets and screw them into your standing boards. These brackets will screw into the bottom of the monitor stand. You should screw the longer side into the standing board, and the top of the bracket should be even with the top of your standing board.
You should now have a stand that you’ll be able to connect to the desk, and that the monitor stand will sit on.
Connect to the monitor stand
You’ll be connecting the monitor stands to the top of the desk. Measure 8 ½ inches off the edge of your desk - this is where the edge of your stand will be. The stand should line up to the back of the desk.
You need to pre-drill three holes in the stand that will go down into the desk. Drill those holes through the stand into the desk - you’ll be using 2 inch screws. Do this for both stands.
Screw the stands to the desk with 2 inch screws (this will go through your 2 x 4 and ½ an inch into the desk. Place the monitor shelf on the top of the stands where it will be drilled in. Grab a pencil and mark where you will screw the metal brackets to the shelf.
Take the shelf off of the desk, and lay it face down on the floor. Pre-drill the holes so that you can screw it on easier. Without pre-drilling the holes, it’s going to be really hard to screw the shelf in as your drill may not fit.
Lay the shelf back on the stands, and screw them in. If your drill will fit inside, you can use it. Otherwise, you’re going to have to use your screwdriver.
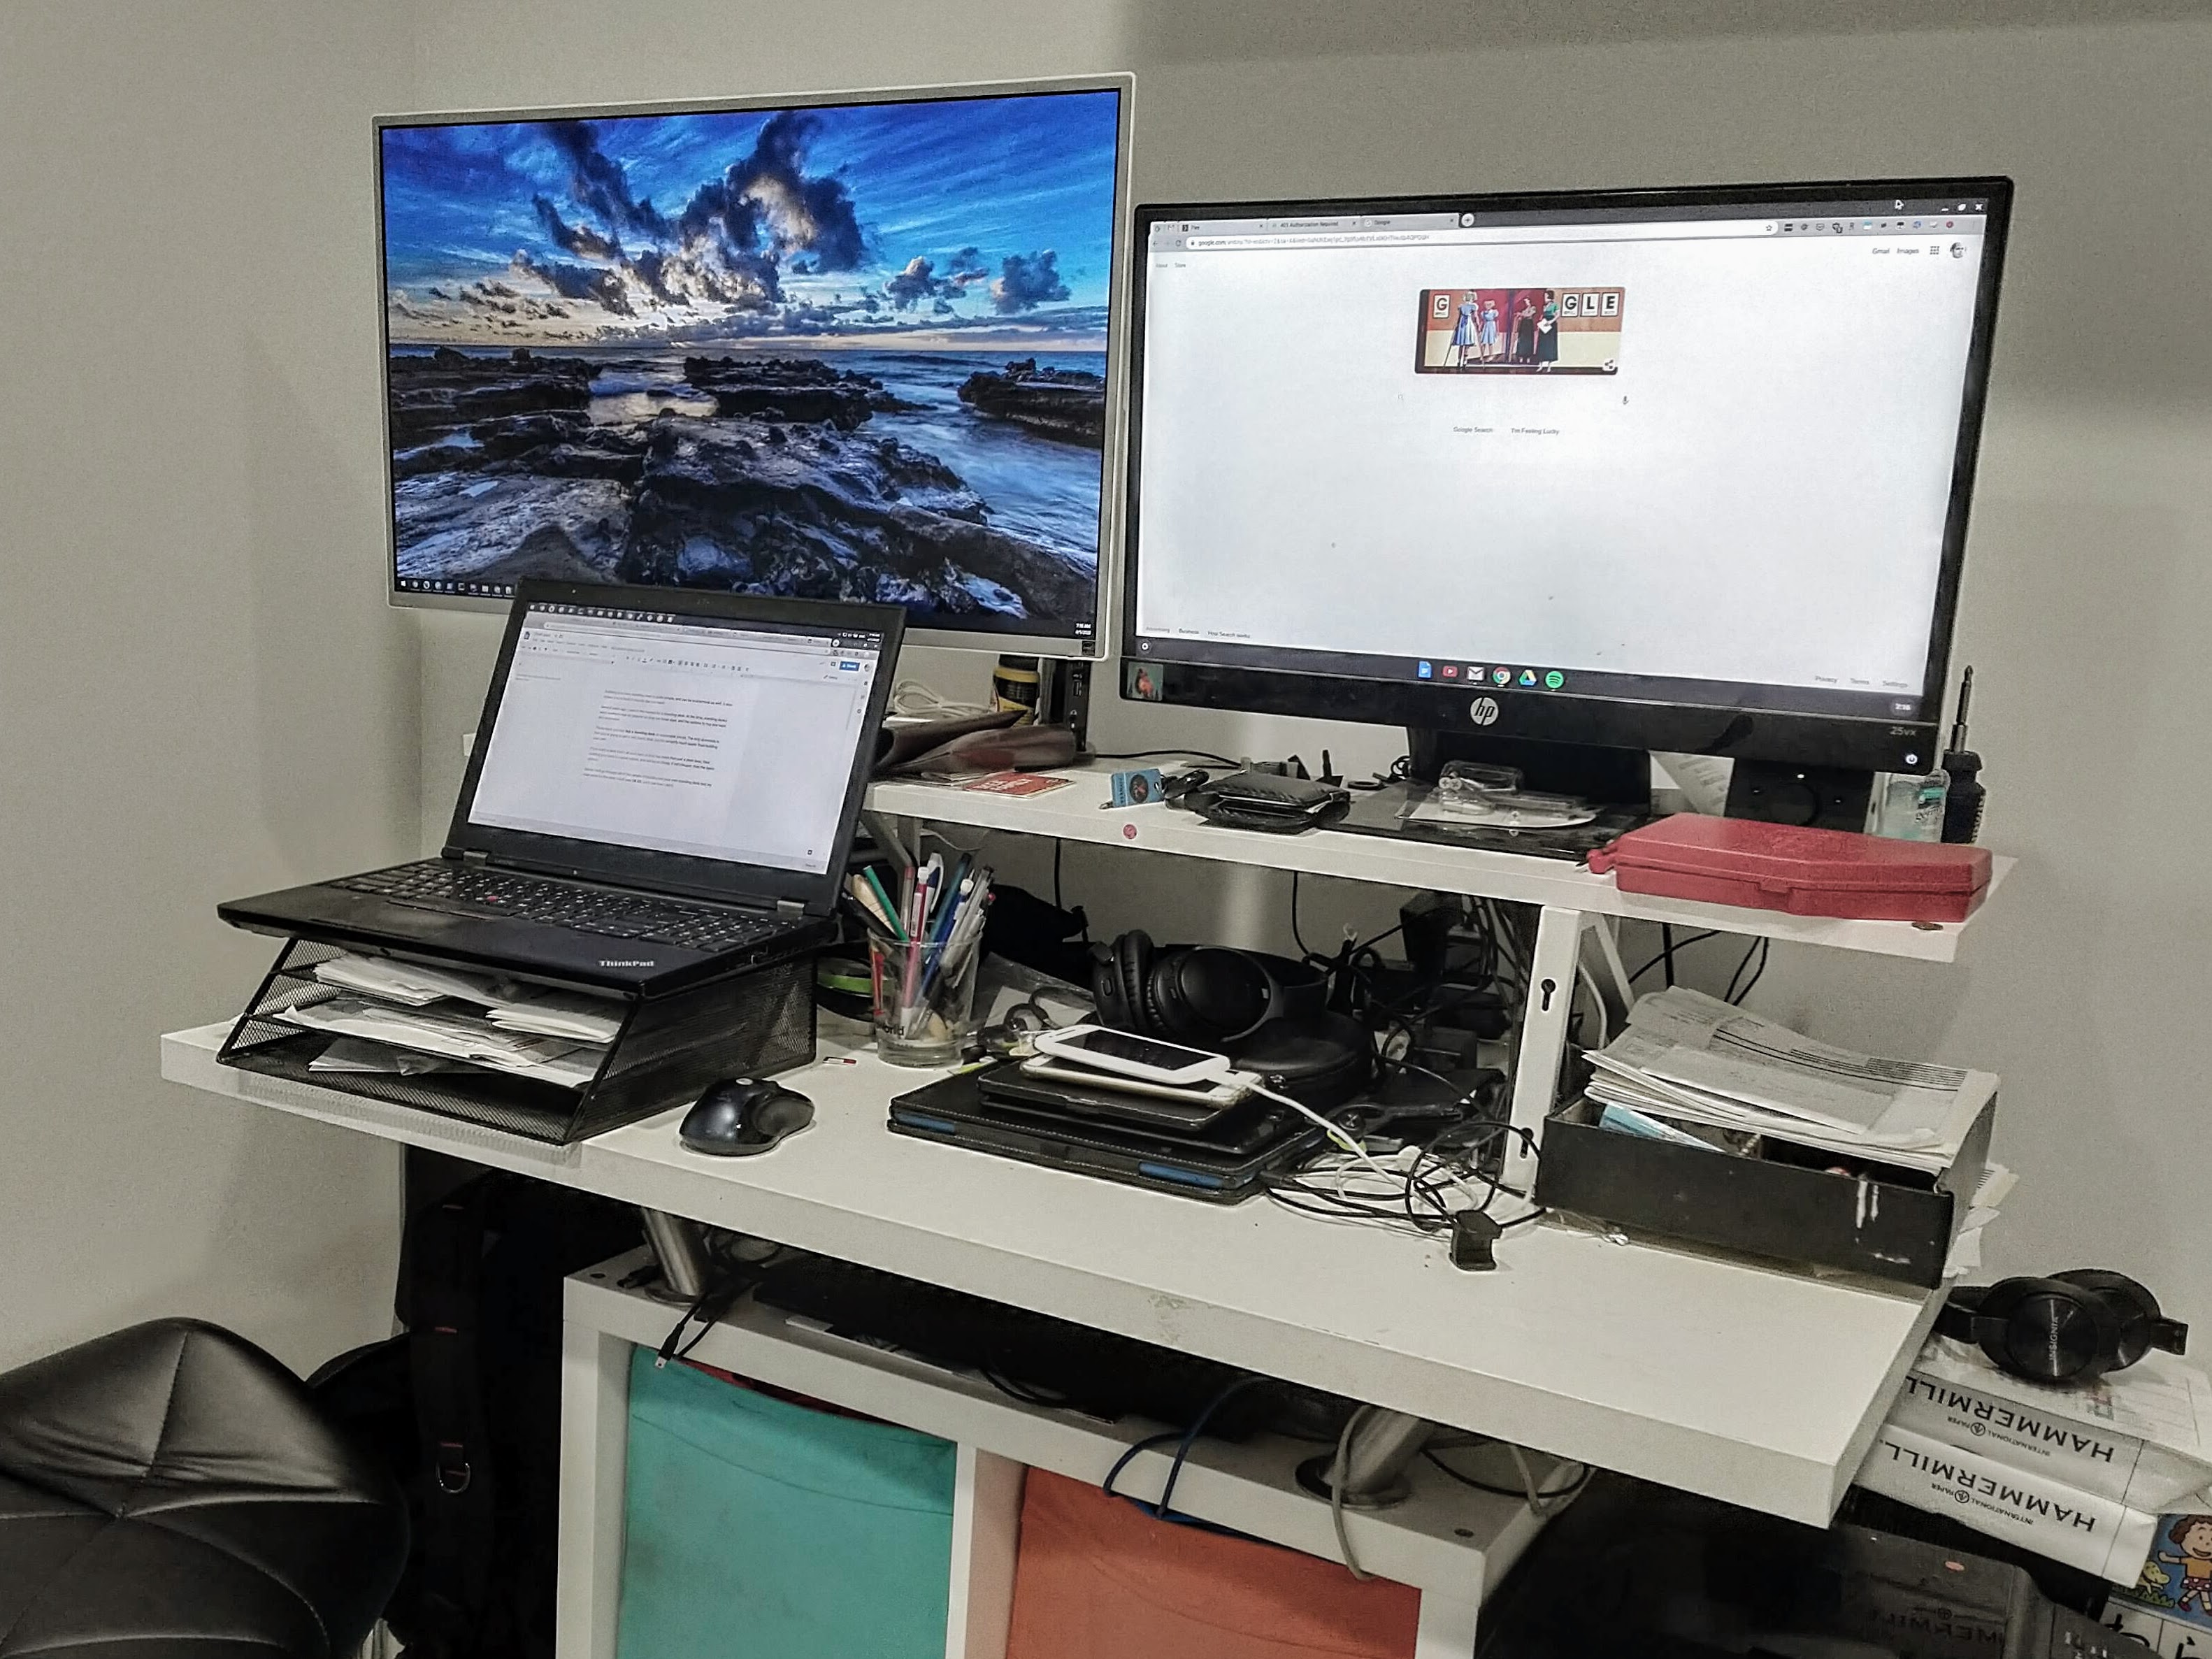
Your monitor stand should now be solidly connected to your desk, and you can place your monitors on top of it.
Conclusion

For just under $200, you should have a custom desk, with plenty of storage, and something that will be extremely sturdy.
If you have trouble standing all day, grab a stool that you can use to sit down on when needed.
Enjoy.


