
Building A Retaining Wall
This post contains references to products from one or more of our advertisers. We may receive compensation when you click on links to those products. Terms apply to the offers listed on this page. For an explanation of our Advertising Policy, visit this page.
Retaining walls have many purposes, and can look really good in your yard. Building a retaining wall is a large project, but can save a lot of money.
There are many reasons you might want to build a retaining wall in your yard - perhaps you want to build an elevated garden bed, or perhaps some other type of landscaping look that you want to capture.
Whatever the reason you want to put a small retaining wall in your yard, you’re going to want it done right. Building a wall incorrectly is going to lead to it having to be redone, and it will be much harder to accomplish the second time around as you’re going to have to remove any of the old materials that you already have in there.
Before we get into the details of building a retaining wall, I will state that this is not an easy project. It will take several hours, and requires attention to detail. As I mentioned above, doing a poor job on the wall will lead to issues down the road that are going to be really hard to deal with.
Additionally, before you begin any work, you should make sure that there are no restrictions in your city about building your own wall. The taller you go with a retaining wall, the more likely you’ll run into issues with requirements by the city. The wall that I built, and will be using as an example, was 2 ½ feet tall. That didn’t require any additional permits or engineering by the city, but be sure you verify before you start such a project.
Figure out the layout of your wall
The first step for your retaining wall is to figure out the basics of where you want the wall to stand and how high it will be. Will your wall curve or will it be straight? These are important questions to answer so that you can find and buy the correct materials for your project.
Draw a basic layout of how the wall will look, and then get some basic measurements of how long the wall will be. Once you know where the wall will stand, measure the height for how high you need it.
Verify that you are within all city requirements
Now that you know where you want the wall, and how high you need it, it’s time to do some research with your city. Most cities will have restrictions on the height of a wall depending on where you put it (backyard or front yard), and potentially how close to your property line these things end up.
Additionally, I should mention that if you have an HOA that covers your house, they likely have even stricter rules around what you can and can’t do. Make sure you verify with the HOA that you’re within the rules or else it could be a costly mistake - I’ve found that HOAs are more likely to find any violations than the city.
For your city, you’ll need to either visit your city’s planning and zoning offices or do your research on the city website. This may be a bit of a pain, but you’ll be happy that you’ve verified there are no additional permits or allowances needed for your project. All of my city’s ordinances are located on the website, so it took about an hour of research and reading to make sure that I was within the requirements that are set forth. If you’re unsure, call or visit the office.
Find materials for your wall
Now that you know what you want the wall to look like, and you’ve got the go ahead from the city, you should start to figure out what materials you’ll be building your wall out of.
There are so many choices for this step. If you’re just building a small wall for your garden bed, then something smaller or cheaper will probably do the job just fine. However, if you’re building a retaining wall that’s going to hold a bit more weight, then a stronger and more reliable material is called for.
I’d highly recommend using a product that is meant for building a retaining wall, and not try to make it up yourself. While you can build a wall out of cinder blocks, it’s going to much more work, and definitely outside the scope of this article. Products that have interlocking blocks or pins to connect the blocks will be far more reliable if you build according to the product recommendations.
While these materials will be more expensive up front, they’ll be worth it in the long run. I used a Keystone product on my wall and couldn’t be happier. Find something that you like, and figure out where you can get it from.
Design and measure the exact size of your wall
Now that you know what material you want, and where to get it from, you’ll need to get exact measurements for your wall. When you go to place an order for your wall materials, you’ll need to make sure you order enough material.
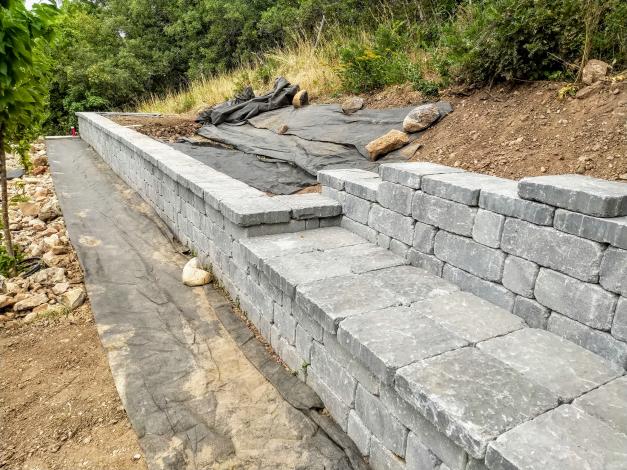
With exact measurements for the length and height of your wall, add 4-6 inches to the height. The reason for this is that you’re going to be going about 6 inches into the ground with your wall (deeper the higher up you go with your wall). You will want to have your first block partially, or fully, underground to have a steady base.
Order your materials
If you need help to figure out how much material you need, work with your supplier of your block materials based off of your measurements. Be sure to also consider a topper block for the top of your wall when buying your materials.
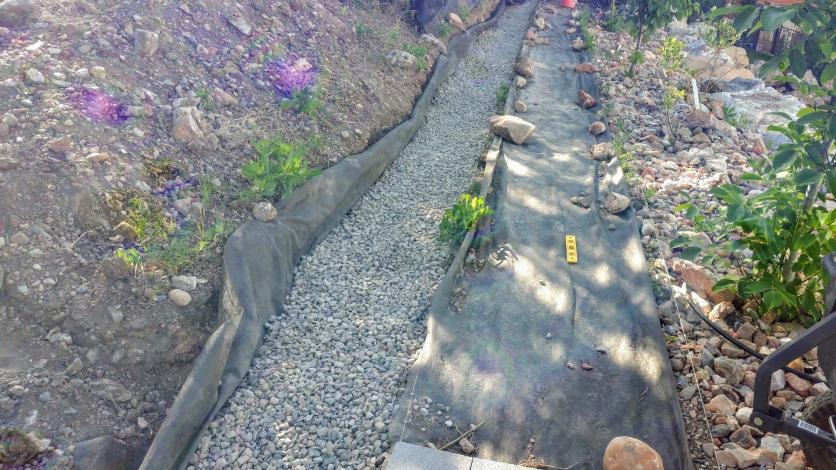
Besides the blocks for your wall, you’re also going to need a lot of filler or crushed rock. There are two places that you’ll be placing crushed rock - under your wall and behind your wall. The purpose of loose rock in these areas is to help deal with water drainage. If you don’t place rocks behind or under your wall, then water will come up to your wall directly, and be held against the wall in the dirt. Ultimately, the pressure will grow to be so big that it will push out your wall.
You are going to need about a 4 inch base of crushed rock on the bottom of your wall (deeper the higher your wall is), and about 10-12 inches back from your wall. So, if your wall is 20 feet long, and 2 feet high, you’ll need rock to fill in the 20 feet under your wall, and the 20 ft x 2 ft x 1ft (40 ft3) behind your wall. Yes, it’s a lot of rock, but if you want a professional long-standing wall, you don’t want to cheap out on this.
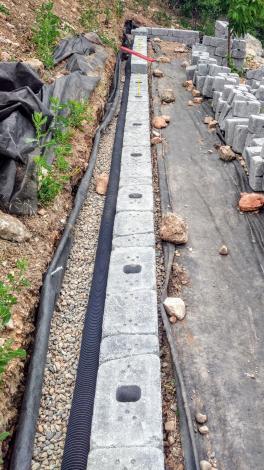
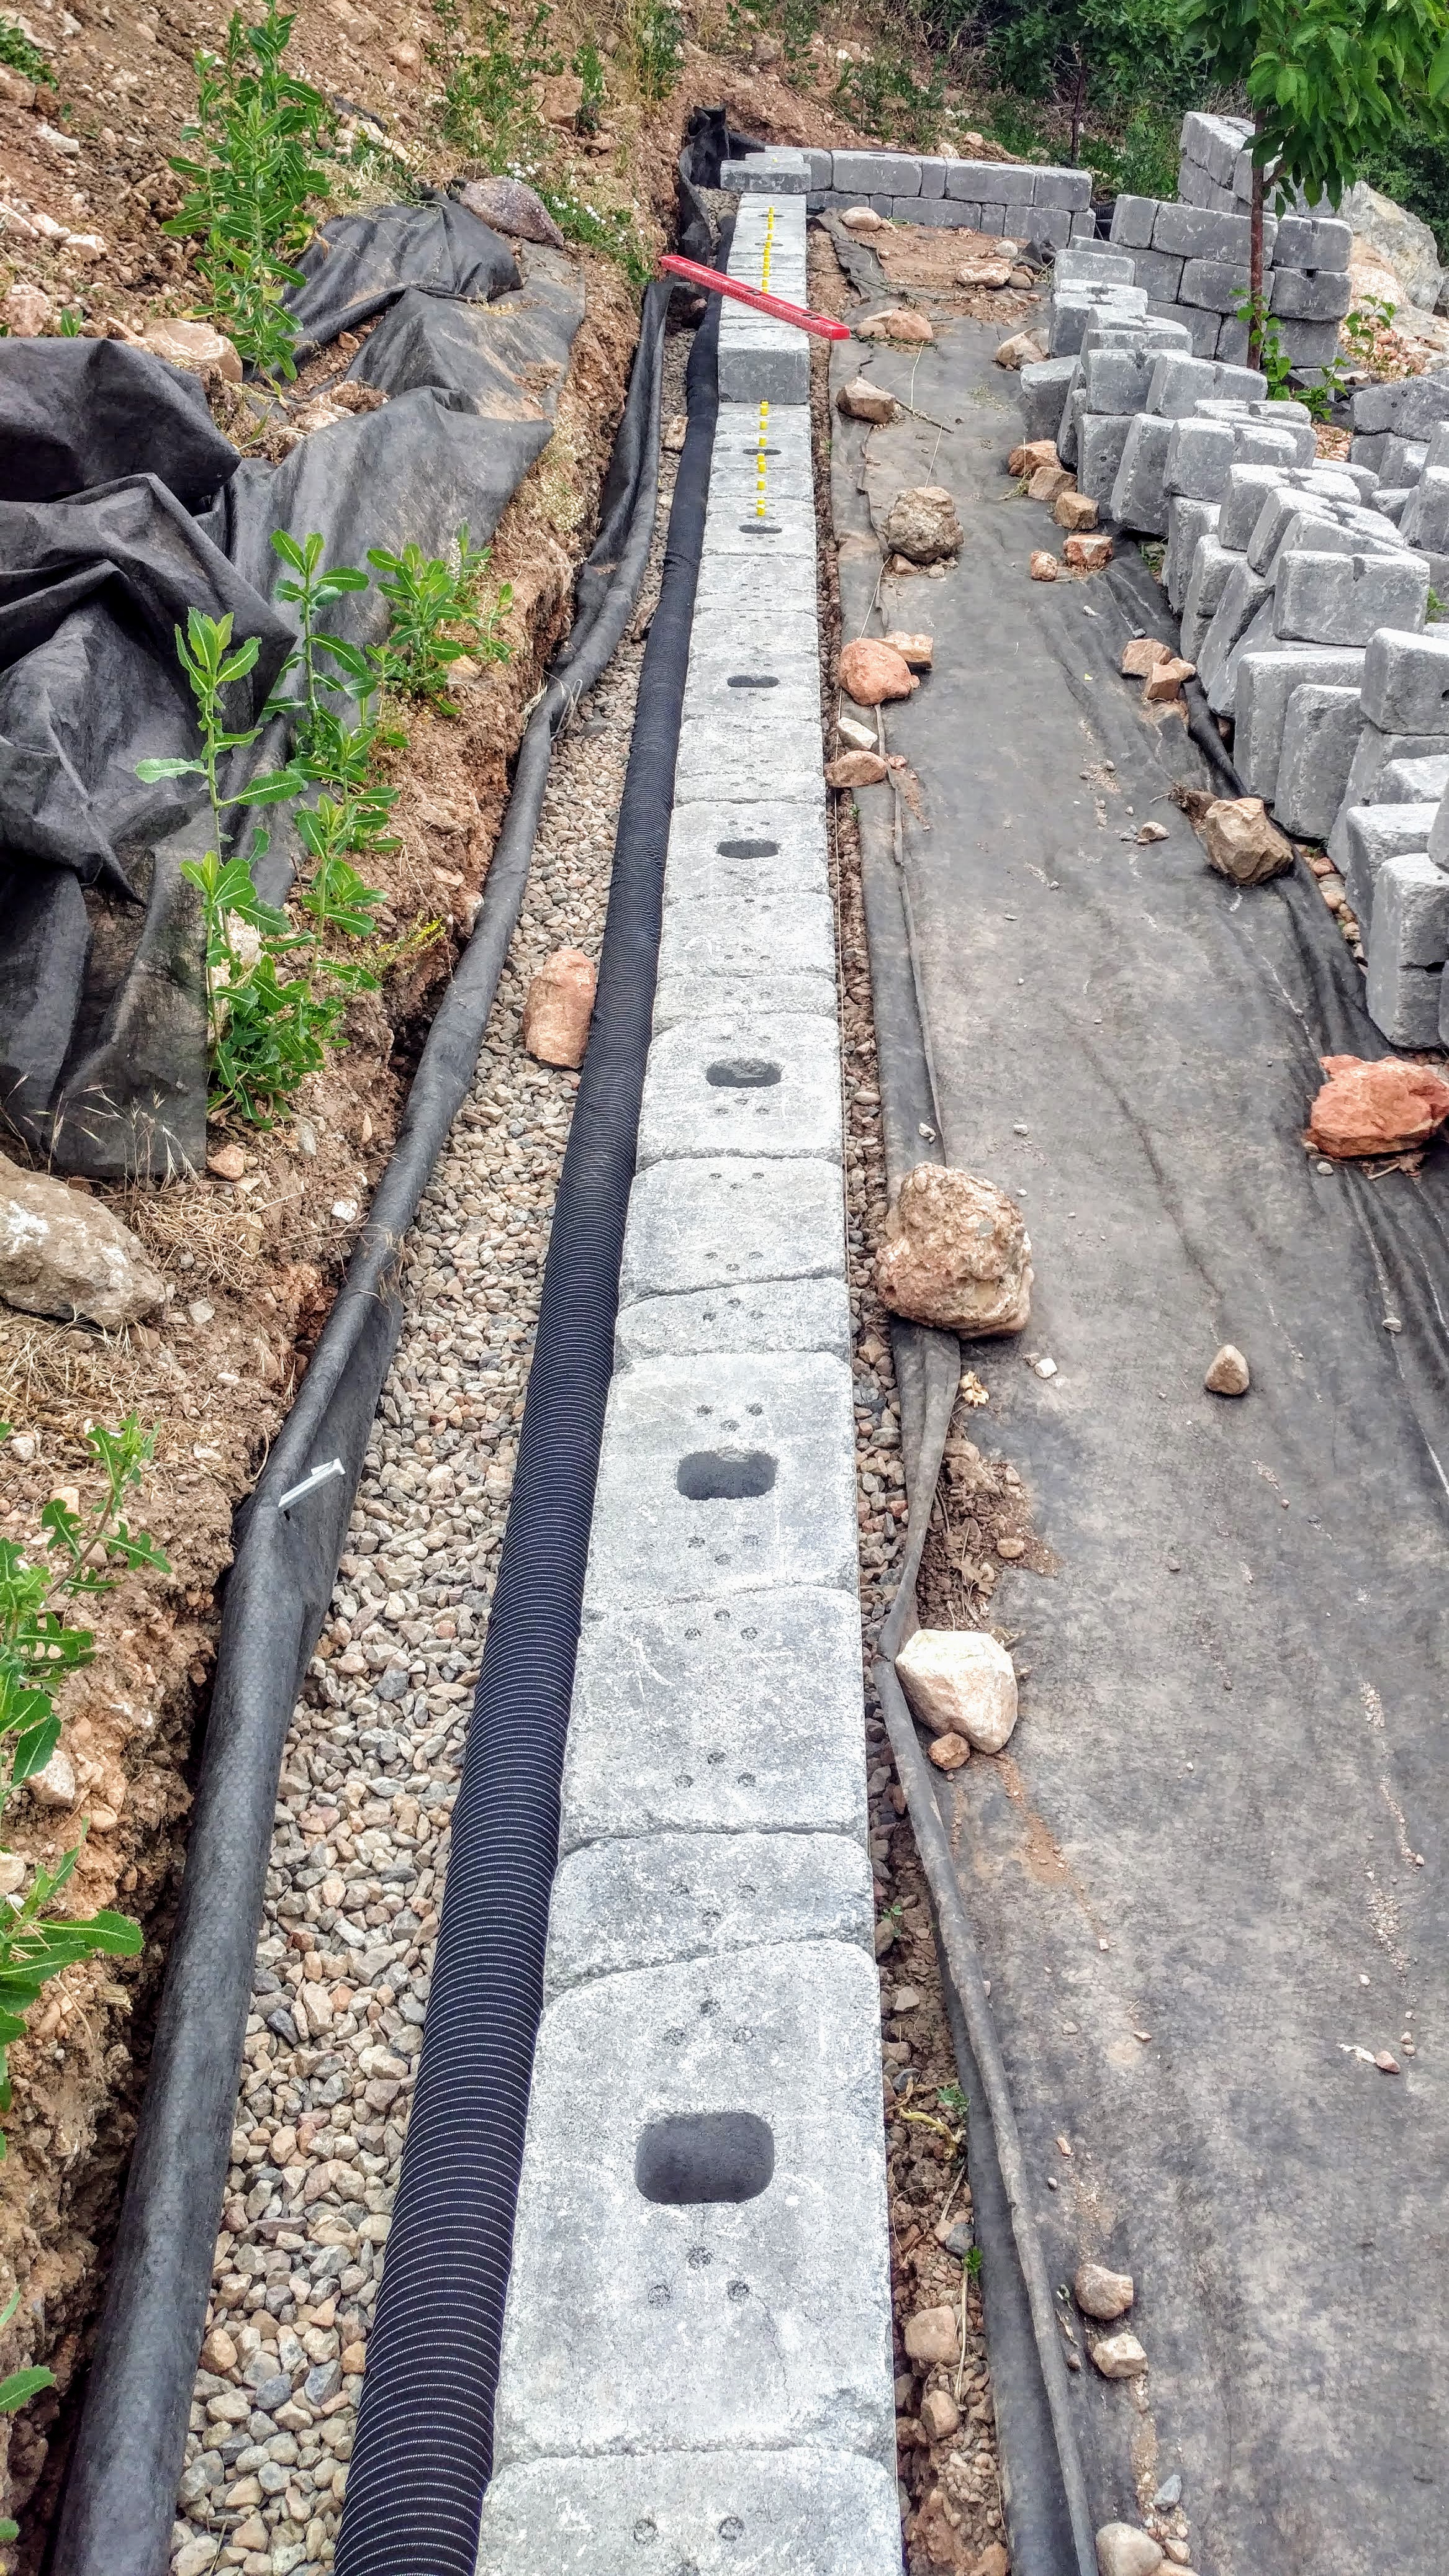
Beyond the wall material, and rocks, you’ll need pipe drainage that is the length of the wall, and you’ll also need black landscaping material that is the length of the wall. The pipe drainage will be placed inside of the rock backfill to capture water and drain it out the sides of the wall. The black landscaping material will be placed under and behind the rocks - it will be placed on the dirt everywhere, and then the crushed rock will be placed on top of it.
Excavate the area for your wall
This step can be started before your materials arrive. Depending on where your wall is going will affect how big this step is. If the ground is flat that you’re on, and you’re just building up a flower bed or platform like area, then this will likely be easier. However, if you’re building against a slope, you’ll have your work cut out for you.
You’re likely going to be going 8-12 inches into the ground depth wise for your wall - 4-6 inches of rock and then your first block level. For my wall, which is a heavy retaining wall, I went 8 inches deep. That was enough to kill me off as I was doing it all by hand.
Beyond your depth, you also need to make sure you have 10-12 inches of space behind the wall, so if you’re on a slope, you’re going to need to excavate all of that dirt out of the way as well.
Get the base layers exactly right
Your base layer is critical in your wall building. If your base is crooked, or not flat, the rest of your wall will be crooked and not flat. It will only become more apparent as you build your wall higher. Getting your first layers exactly right will make your wall look great.
After you’ve excavated your area, you’ll want to make sure the ground is compacted. You’ll want to either use a manual tamper, or else rent a jumping jack. I’ve found a tamper to be sufficient for this step, but a lot more work.Get the ground compacted and flat.
Now that you’ve got a compacted and flat area, lay down your landscaping material and place the crushed rock on top of it - 4-6 inches depending on how deep in the ground you went. Tamper or flatten the rock down. You want your rock layer to be completely even. You’ll need your level for this. Your blocks will be sitting directly on this rock layer, so as you move the length of the wall you’ll want it completely flat.
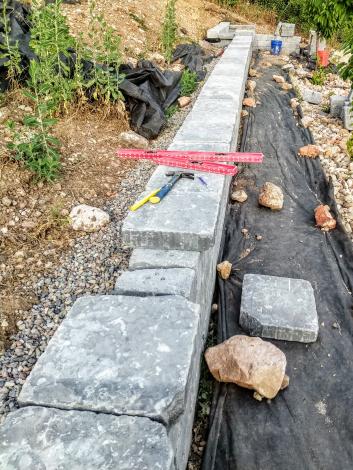
Place your blocks on top of your rocks base, use your level to measure that you're flat, and add more rock (or remove) as needed to get it right. Yes, it will take a long time for this first row of blocks, but I promise that it’s worth your time to get it exactly right.
Build up the rest of the wall
Once you’ve got the first row of blocks in place, and they’re all even, and where you want them, it’s time to build out the rest of the wall. Depending on the blocks you have, you’ll want to make sure that you interconnect them according to the specifications. If you don’t have interconnecting blocks, then you’re going to want to make sure you have come up with a solid way to keep the blocks connected.
As I was using a Keystone block, this meant that I was placing pins in the blocks and then putting a bit of construction adhesive on the blocks. This added both the pins and glue to keep my blocks from moving around. As you go down the row, make sure that you’re even - if you did a good job on your first row, this should be pretty easy.
Repeat this step for each layer up that you need to do on your wall. The higher up you get, the faster it becomes as there’s not much you can do in terms of changing if your wall is even, or where it’s at.
Water drainage behind the wall
Once you have the wall as high as you want it, it’s time to get the drainage system built out behind your wall. Lay down your landscaping material against the back layer of dirt, and place 2-4 inches on top of it, directly behind the wall. Take your drainage pipe, and place it directly behind the wall, right up next to it.
Place crushed rock on top of the drainage pipe, and fill up the rest of your area behind your wall with the crushed rock. Leave about 4 inches from the top of your wall as you’ll cover this with dirt. Pull the top of the landscaping material over the rocks that are behind your wall, and cover the rest with dirt (you can do the dirt after the next step if you’d prefer).
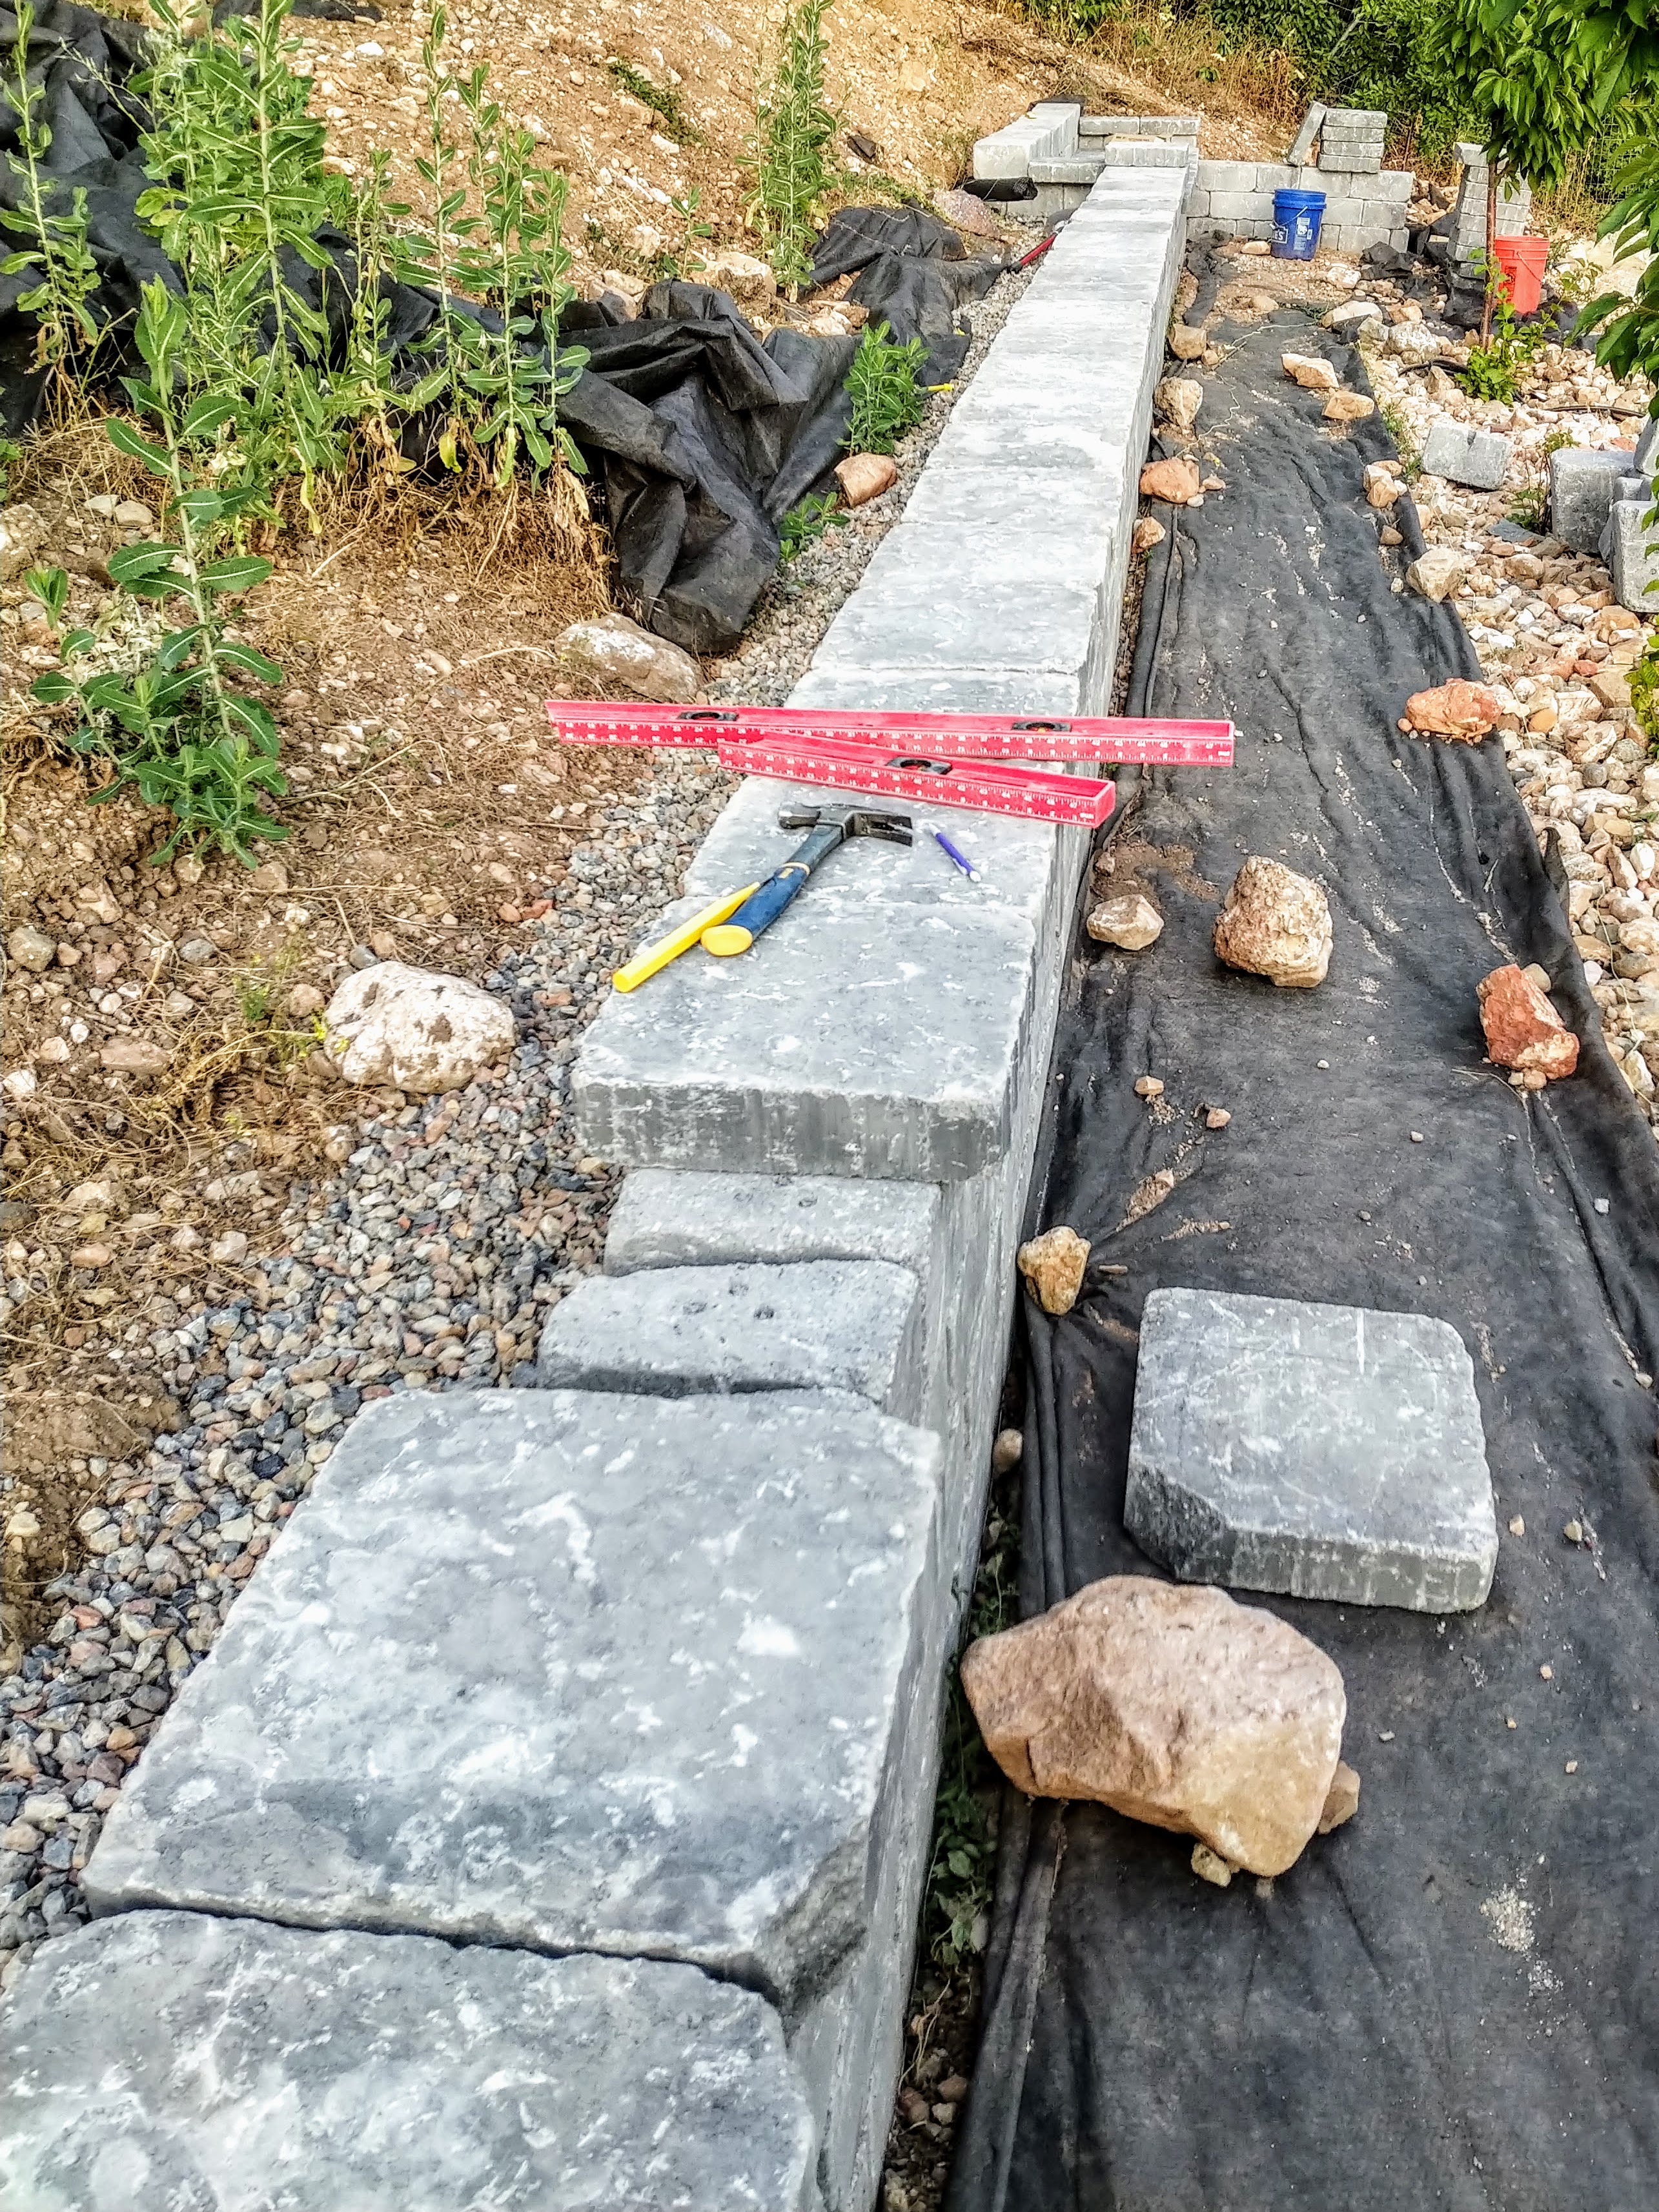
Finish the top of the wall
Now that you’ve got your wall built up, and your rock in place behind it, it’s time to complete your wall. Place your topper blocks on top, and secure them to the wall. I ended up using a good solid construction adhesive for this step.
At this point, you should have a flat and even wall. If you’ve been meticulous about building it, it should look great. Be proud of what you’ve accomplished, and go take a hot bath and long nap.
Conclusion
Building a retaining wall is a very large project, and will take a lot of work, but by doing it the right way, you can have a beautiful addition to your home.


